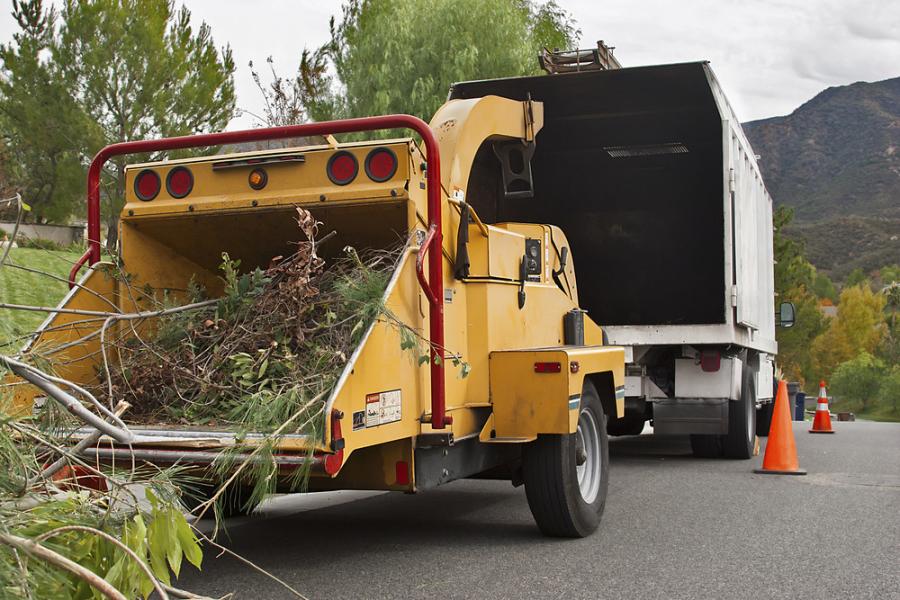
Wood chippers are an amalgamation of parts, including a hopper, a collar, a chipper, and usually, a collection bin. Typically powered by a combustion engine (although many electric versions exist), they range in horsepower, depending on size and type. How wood chippers work is an interesting mix of processes.
All wood chippers contain the same basic pieces. An engine, whether electric or gas, provides power to a gearbox containing v-belts and pulleys, which lead to knives or rollers that chop, slice or mulch or grind, depending on the size and nature of the wood it receives. Most feature separate chutes for the resulting product: one for wood chips and one for mulch. The larger the machine, the bigger the branches it can handle.
Here are the different processing mechanisms for wood chippers:
Drum Chippers: Drum chippers feature a large, motor-run drum inside the machine. Drums are able to pull in material before cutting it then directing it to the appropriate chute. Drum-style chippers work quickly, but run loud and require careful operation. Users must feed carefully, so as to avoid blockages and jams.
Disk chippers: Disk chippers contain a steel disk the edges of which are cut into blades. Wheels (generally hydraulic) move the material to be chipped toward the blades. Disks come in a wide array of sizes and horsepower.
High Torque Rollers: Torque rollers are a common feature of electric chippers. Quieter than gas powered chippers, electric models are generally preferred by homeowners associations and considerate neighbors. The rollers work by grinding the material rather than chopping.
Whole Tree Processors or Recyclers can cut branches or trunks up to six feet wide, while Tub Grinders process trunks or branches up to eight feet wide. They process wood through pulverization rather than cutting, chopping, or grinding. These are used by professional arborists, in clearing or pruning applications.
What is the Noise Level for Wood Chippers?
A wood chipper noise level is high.
The process of suction, followed by the chopping and grinding action of the blades and the ejection of material, produces not only sound but also vibration, which the ear registers. Typically, gas powered wood chippers produce noise at a 110-decibel rate, five decibels higher than a chainsaw. While electric models are generally quieter than their gas powered counterparts, coming in at roughly 85 decibels, they are still considered noisy enough to warrant hearing protection. Prolonged use is common for workers, or even homeowners who simply rent a machine for the day.
Ongoing, regular use without hearing protection may lead to gradual hearing damage. Operators are therefore advised to use either ear muff or earplugs, preferably custom fitted.
Keeping Wood Chippers Running Smoothly
Maintaining your wood chipper after purchase is vital in ensuring you receive years of use from your device.
Gary McKeag, a brush chipper service technician at the Vermeer Corporation, recommends following these two valuable directives will make a significant impact in promoting strong, lasting machine performance.
Foremost, he suggests greasing the cutter drum or disc bearings after use, when the machine is still warm. Fresh grease should be applied until the old grease emerges. Performing this task rids the machine of potentially damaging debris, and expels moisture that might corrode the bearings.
Secondly, it's imperative that the knives be checked after each use to confirm they remain damage-free. Search carefully for debris buildup. The knives provide the all-important chopping feature of the machine, so they must be carefully maintained to operate in peak condition. If you delay until function is reduced, your productivity will diminish, and the bearings will suffer. In addition, remember to periodically confirm that the torque on the knife mounting hardware is sufficient according to operation instructions.
McKeag also recommends that daily brush chipper owner/operators should pay regular attention to the engine compartment and radiator. With new emission standards on the rise, higher engine operating temperatures are common, therefore demanding larger radiators. Ensuring that the radiator remains unclogged is essential in avoiding engine overheating that could lead to a shutdown. Blowing out engine compartments helps reduce high temperatures and "fines" that can pass through the radiator. Too much debris behind the feed rollers prevents full functioning. To restore your machine to pre-debris standards, deploy an air compressor or leaf blower. The fact is that clean machines always run better. Once the machine has been cleaned, you can easily confirm that all shielding, switches, control bars and hitching components are healthy.
Lastly, take a walk around the machine in advance of operation. Note any aspect that could reduce productivity, such as a loose hydraulic line, clamp or fitting, a worn hose or missing hardware. Then, make the repair, or arrange to have it done professionally.
Care for whole tree chippers is somewhat more involved. According to the Bandit Industries website, it's crucial to ensure all knives are aligned with a properly adjustable anvil. Imperfect knife and anvil maintenance detract from fuel economy and production, and add to machine wear-and-tear through the increased vibration produced by misalignment. Therefore, every time knives are sharpened or replaced, the anvil must be readjusted to ensure proper clearance.
How to Repair a Clogged Chipper
How to repair a clogged chipper is a common concern for many machine owners. Serious clogs may require a visit to your local service department, but there are steps you can take to independently clear a blockage.
1. Your first step must be to disconnect the spark plug to ensure the machine is off and will not restart while you work. Doing so will help you avoid serious injury.
2. Next, unlock and raise the exit chute guard to reveal the exit screen. Once the exit screen is bared, remove any and all material from the chute. Since the spark plug is removed, you may use your hands for the larger pieces. For smaller bits of material, long nose pliers will aid you in completely clearing the area.
3. Once the metal guard screen is clean, you will want to test the chipper for full functionality. To do so, lower and lock the exit guard. Only replace the spark plug when you're sure all material has been removed and your hands and clothing are a safe distance from the machine. Once the spark plug is returned to use, you may attempt to restart the shredder.
If an easy restart and clear chute elude you, there are further steps you can take.
1. First, as always, remove the spark plug once more. Even if you're feeling frustrated, safety always pays.
2. Unlock and raise the exit guard once again. Next, remove the metal screen. Usually it has two long bolts on the top and bottom holding it in place. This step could require a bit of effort; remember to pry gently rather than aggressively pulling out the screen once the screws are removed.
3. Because screens are not two sided and/or reversible, store it in a way that will allow you to remember which side should face out.
4. You may now pull the starter cord to expose the flails and hopefully gain access to the remaining clog. Persist in pulling a few inches more, stop, and look for more clogs. Reach in and dislodge anything you can find.
Continue this process, taking special care to remove your hand in between pullings. Keep repeating the pulling and searching process until all flail areas are absolutely clear. The cleared flails should clank as they respond to turning.
Occasionally, chippers and shredders become clogged in a manner similar to mowers, when damp or wet material accumulates inside the cutting mechanism. When this occurs, follow these steps:
Lower the exit chute and lock it into place. Keep the guard screen out for the time being. Reconnect the ignition wire. Attempt to start the shredder. If it doesn't start immediately, persevere, as each starting attempt forces the chipper/shredder to release more dried or caked - on material.
Once the motor catches, let it run for a few minutes. Then, turn it off before reinstalling the exit guard and tightening the bolts. Finally, lower the exit chute and lock it into place.
If your machine is working, continue with the task at hand, avoiding whatever material previously clogged the chute. Damp bark can cause problems for chippers and shredders. The job may need to delay until the wood in question is dry, meaning when the bark is brittle and won't peel off in strings.
If none of these efforts clears your machine, you may need to seek the help of the service team for your particular brand of chipper. Not only can they likely repair or dislodge any remaining blockages, but they will also be able to determine if your machine is malfunctioning due to another issue.
This story also appears on Forestry Equipment Guide.


